fundamental.sh
Spritesheet animation and pixel art with aseprite, threejs and react-three-fiber
Ben (@vivavolt), November, 2021
I like pixel art. No matter how anti-aliased and raytraced modern games become there's something about pixelly low-res art that just grabs me. Is it nostalgia? Sure, a little, but it feels inherently fun in a digital way. Discrete rectangles of colour become tiny virtual beings and worlds to explore, just add a few drops of imagination.
I've been making games since I was a kid and, while I'm far from the best, I like to think I've gotten pretty good pixel art:

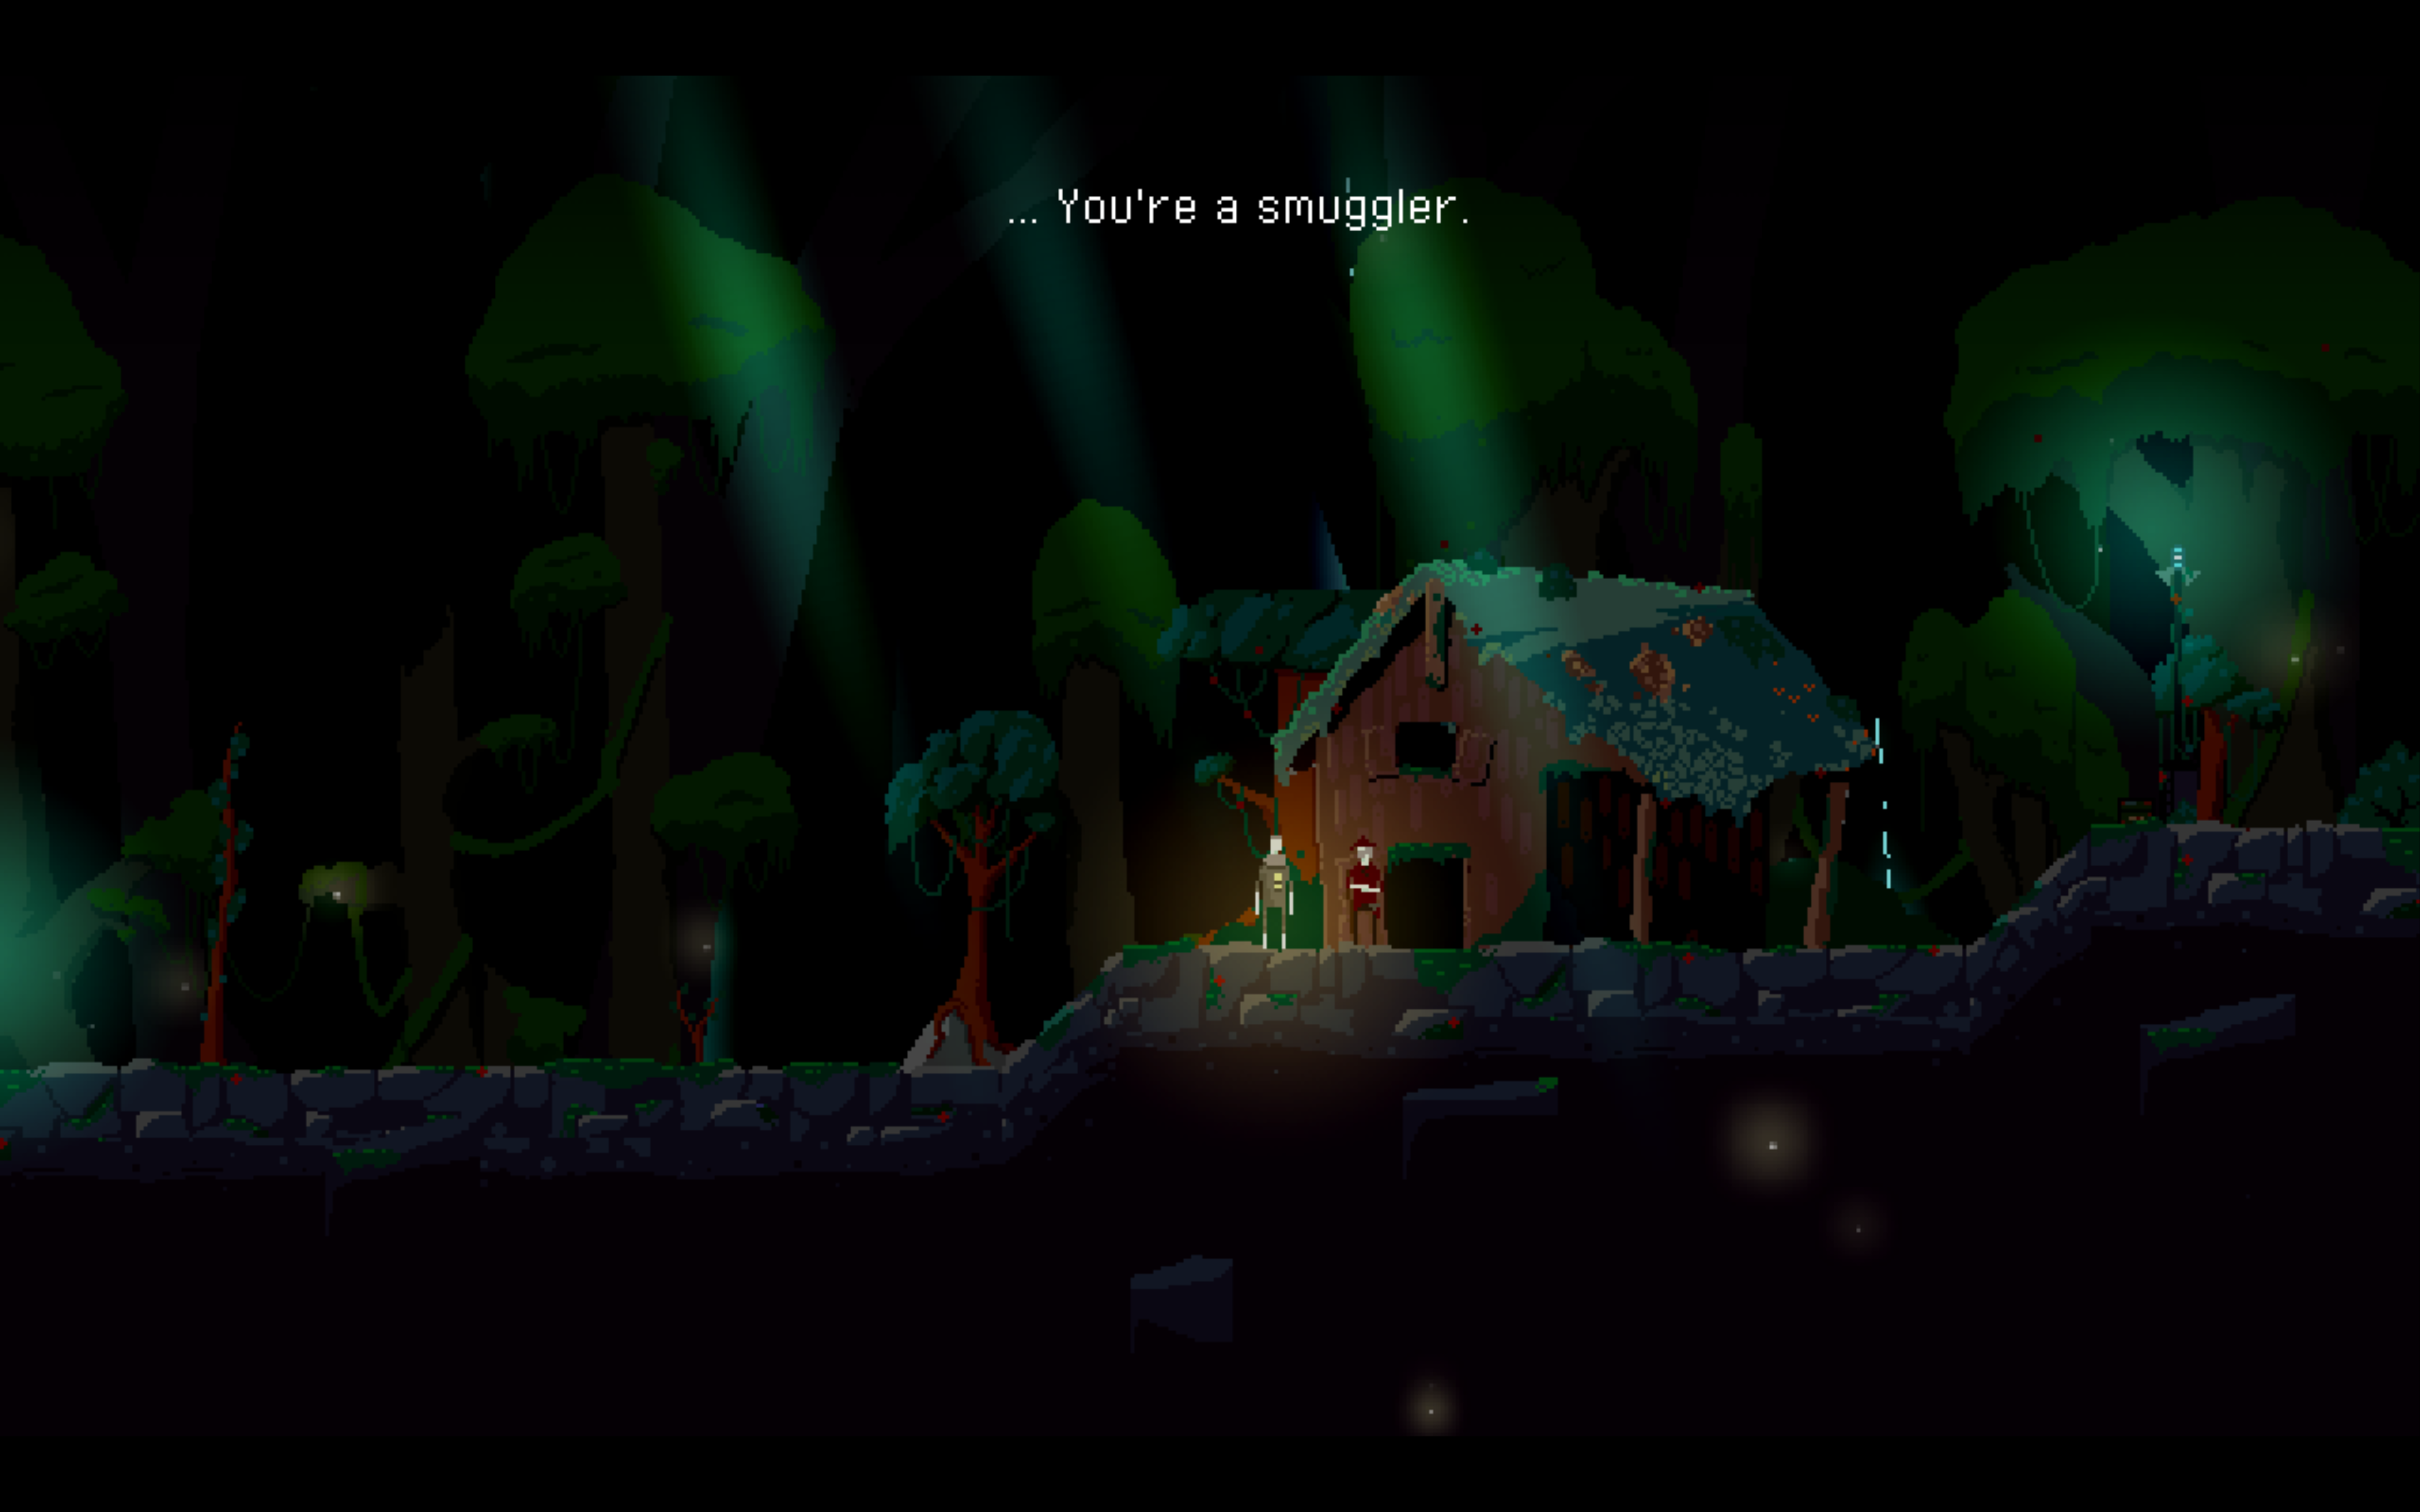
My game The Thin Silence, 2018
As I continue my research into modern HTML5 / webgl game development I naturally found myself asking the most important question: "how can I make this more pixelly?" In my current project I've become especially fond of blending pixel art and low poly 3D:

My current project The Song of The Fae, 2021
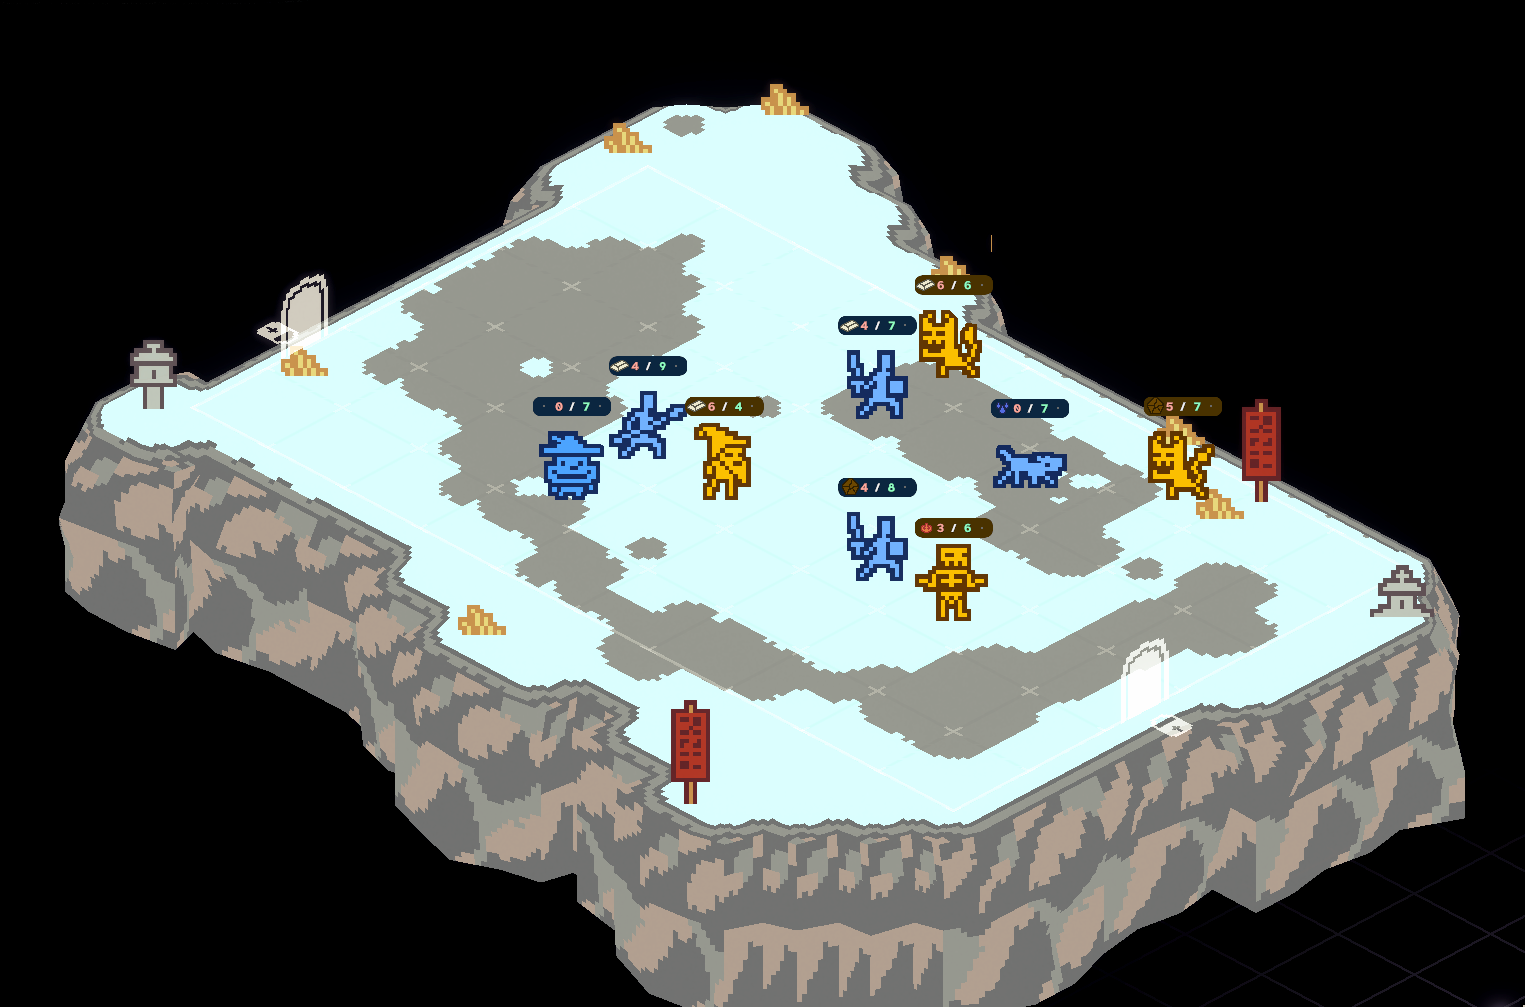
I've also been posting mockups in a similar style on twitter, there's something about this level of fidelity that I'm obsessed with right now. It allows for rich level design, retro vibes and it's possible for one person to make everything.
This style is actually quite easy to pull off in Unity, Godot, Unreal etc. but over the past 12 months I've increasingly felt that I want to turn my focus away from the encumbant game engines and towards the web. In my last post I wrote about approaches to animation for generative art and game development in the fantastic react-three-fiber.
So in this post I want to keep checking off my gamedev must-haves for the web and, for that, we're going to need some pixel art.
We'll cover:
- Rendering 2D images and pixel art in a 3D context
- Exporting and playing back spritesheet animations
- Exporting and importing rich Aseprite animation data
I'm not assuming any background in graphics programming in this post, but I am assuming you know Typescript, React and the essential hooks like useState and useRef.
Crisp Pixels in 3D
To get pixel art aesthetics in a 3D environment requires a little bit of setup. I'll be using react-three-fiber throughout this post which means we can leverage all the power of three.js underneath.
An astute reader might notice that we have a dimensional mismatch here: our scene is 3D but pixel art is 2D. Whether you know much about graphics programming or not, you've likely heard of the standard 3D rendering approach: everything is made of triangles.
So, if we have a rectangular image we can make a rectangular canvas for it using two triangles:

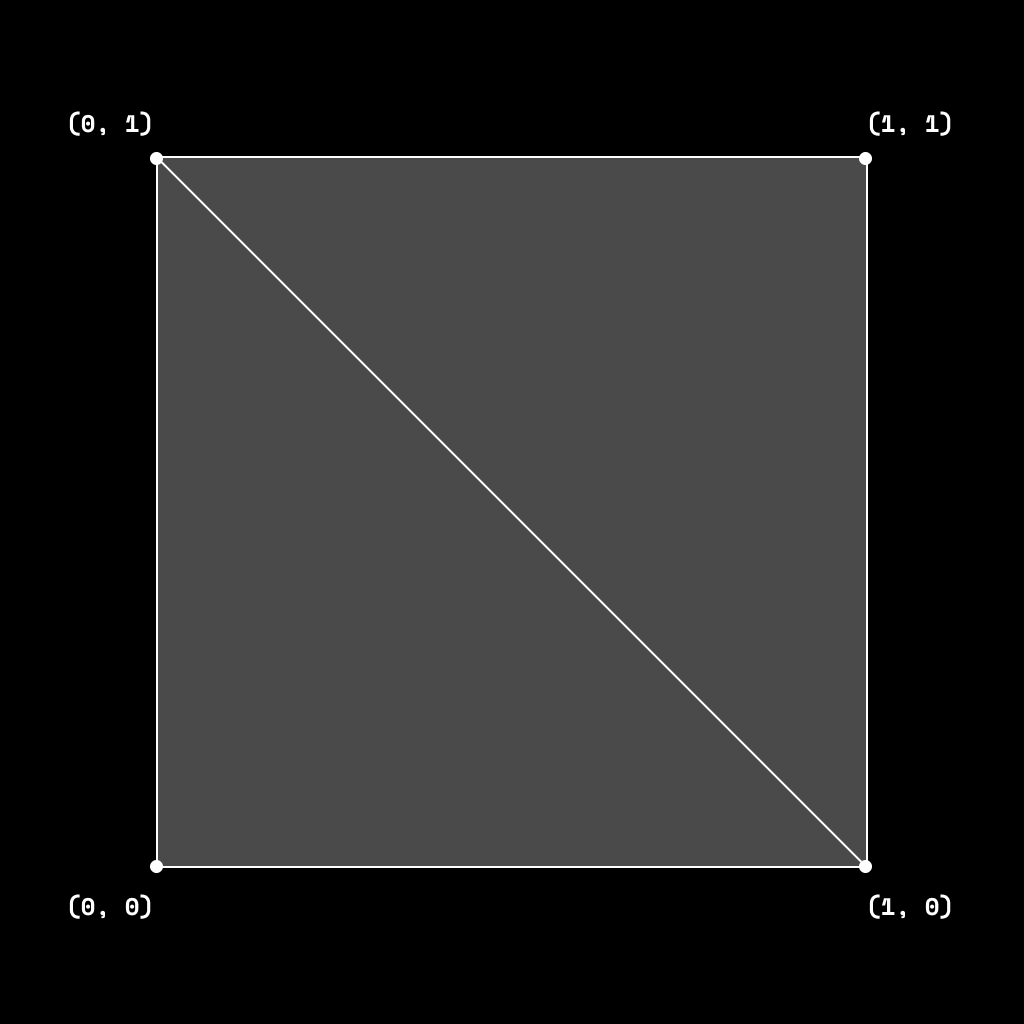
The humble quad in all its glory
You'll see this everywhere in graphics tutorials, often with a fun gradient on top:
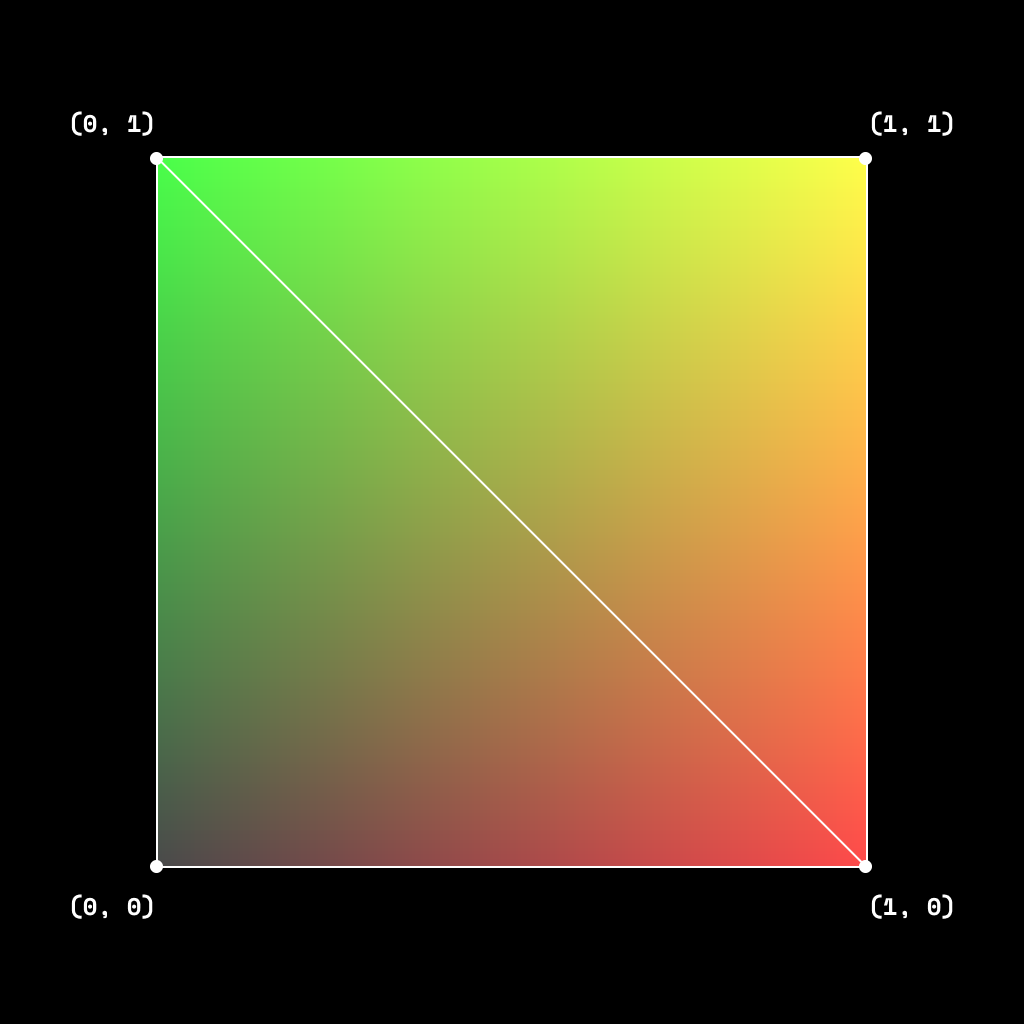
The humble quad with UVs visualised
This gradient effect is a visual representation of the UV coordinate space[ref], which is (mostly) used to express how textures are applied to 3D meshes. They are a normalised representation, meaning they take values in the 0...1 interval with the center of the image being (0.5, 0.5). The name UV doesn't have a particularly deep meaning, it's used because x and y are already taken. Who says programmers have no imagination?
If we manipulate our UV coordinates correctly we can map a texture onto our quad, in this instance I've used a 36pxx36px image so the translation from UV to texture pixel coordinates (a.k.a texels) is simply scalar multiplication by 36.
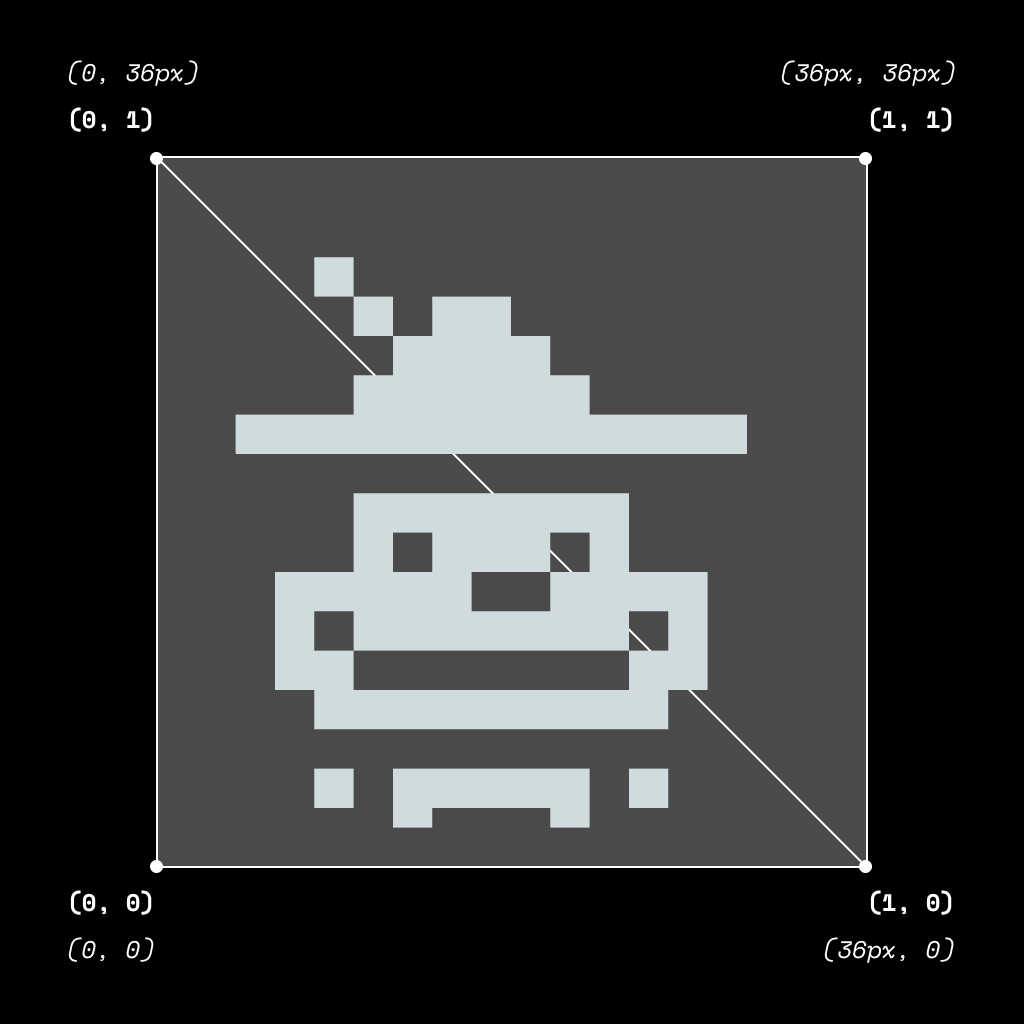
The protagonist from my game The Song of The Fae with UV mapping
Thankfully react-three-fiber gives us <mesh> and <planeBufferGeometry> primitives to work with which will actually handle the creation of a quad and the UV mapping process. Note that when applying a texture to a plane you need to consider whether it's applied to the front (THREE.FrontSide), back (THREE.BackSide) or both sides (THREE.DoubleSide) of that plane.
const texture = useLoader(THREE.TextureLoader, src)return (<mesh><planeBufferGeometryattach="geometry"args={[1, 1]} // a 1 x 1 plane will use 4 vertices/><meshBasicMaterialattach="material"side={THREE.DoubleSide}map={texture}transparent/></mesh>)
You can toggle wireframe view and the side settings in this sandbox:
You might've noticed that our pixel art looks a little blurry here. That's due to our texture filtering settings, by default most graphics libraries use bilinear filtering on textures. This is a totally sensible default but it definitely works against our purposes right now. We need to switch to what's called nearest-neighbour filtering instead, this is "computationally cheap" scaling which doesn't try to smooth anything out.
const texture = useLoader(THREE.TextureLoader, src)texture.minFilter = THREE.NearestFiltertexture.magFilter = THREE.NearestFilter
The last piece of the puzzle is facing the camera correctly. Putting a 2D image into a 3D space naturally causes it to appear like a piece of paper which can be desirable (see Paper Mario) but often it's preferable to have the image "locked" facing towards the camera. This process of facing the camera is called "billboarding" in games but you'll also hear billboarded images referred to as "sprites".
react-three-fiber also provides a <sprite> primitive which we can use:
const texture = useLoader(THREE.TextureLoader, src)texture.minFilter = THREE.NearestFiltertexture.magFilter = THREE.NearestFilterreturn (<sprite><spriteMaterial transparent map={texture} /></sprite>)
Here's a comparison between the mesh approach and sprite approach side-by-side, notice how the sprites always face towards us?
So now we've got well-behaved static images working, what about animations?
Frame-Based Animation
A series of frames shown in succession over time, creating the illusion of movement.
In my last post I covered continuous programmatic animation, which is awesome, but traditional animation is a little different.
Back in the day animations were drawn by hand on individual cels and layered onto each other to create a frame, cels were then swapped in and out to produce new frames which were in turn sequenced and played back, giving us the magic of motion 🌈.
Spritesheet animation, using pixel art or otherwise, works similarly. We hand-author a series of keyframes, fill in the (be)tweens and add secondary motion.
I'm not going to cover how to actually create pixel art or think about animation deeply here. If you'd like to understand the basics of creating art this way then Derek Yu's introduction is a great place to start.
I'll be using Aseprite to draw, animate and export my pixel art. There's also a free OSS fork known as LibreSprite which is being developed independently. For the rest of the article we'll be working with my Bard character's idle animation, which I created frame-by-frame in Aseprite:
Once you've got an animation playing back in Aseprite it's time to export it. To export an animation we will pack all the individual animation frames into a spritesheet.
An image composed of many sub-images, typically animation frames arranged in a grid.

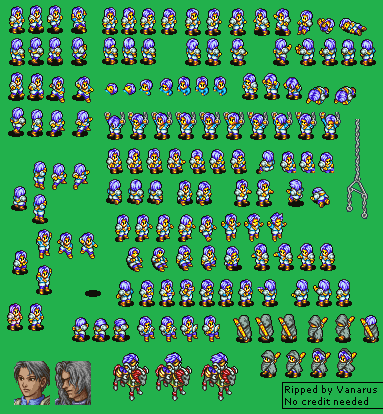
Dedicated fans have exported spritesheets from thousands of retro games, you'll also find plenty of CC0 assets on opengameart.org.
You might be left wondering why we want to do this, after all couldn't we just export every frame as its own image and then import them one by one? Well, yes, we could and for just one animation that would be fine. The problem comes when we want to fill our screen with sprites, all animating indepenently at between 60 and 240fps.
Spritesheets are actually only one case of a more general practice in graphics programming: texture atlasing. A texture atlas is itself a texture composed of smaller textures. How exactly they're arranged varies depending on the specific problem we're working on but, regardless, they're an essential aspect of performant GPU rendering.
Graphics Performance
To understand why atlases are useful, we first need to understand what the GPU is "good" and "bad" at. Fundamentally the GPU loves doing the same thing over and over again, it's incredibly good at taking what's in memory (VRAM) and drawing it many times. What the GPU is comparatively bad at is changing what's in memory, especially at a high frequency.
So, instead of uploading each animation frame to the GPU when it's time to play it, we can upload a texture atlas containing all the frames into VRAM just once and use it to draw every frame. When we change the currently displayed frame we only have to tell the GPU which frame index we want to play, which is much less data (potentially just a few bits) vs an entire texture (possibly kilobytes) leading to higher throughput and in turn, improved performance. This is such a common speedup that game engines will package your raw textures into atlases for you as part of their asset processing pipeline.
There are a bunch of options for exporting spritesheets that are outside the scope of this particular post, they won't affect performance at all. I've opted to export a simple horizontal spritesheet and a json file containing the animation metadata, we'll see how to make use of that data later in the article but for now this is what we'll be working with:

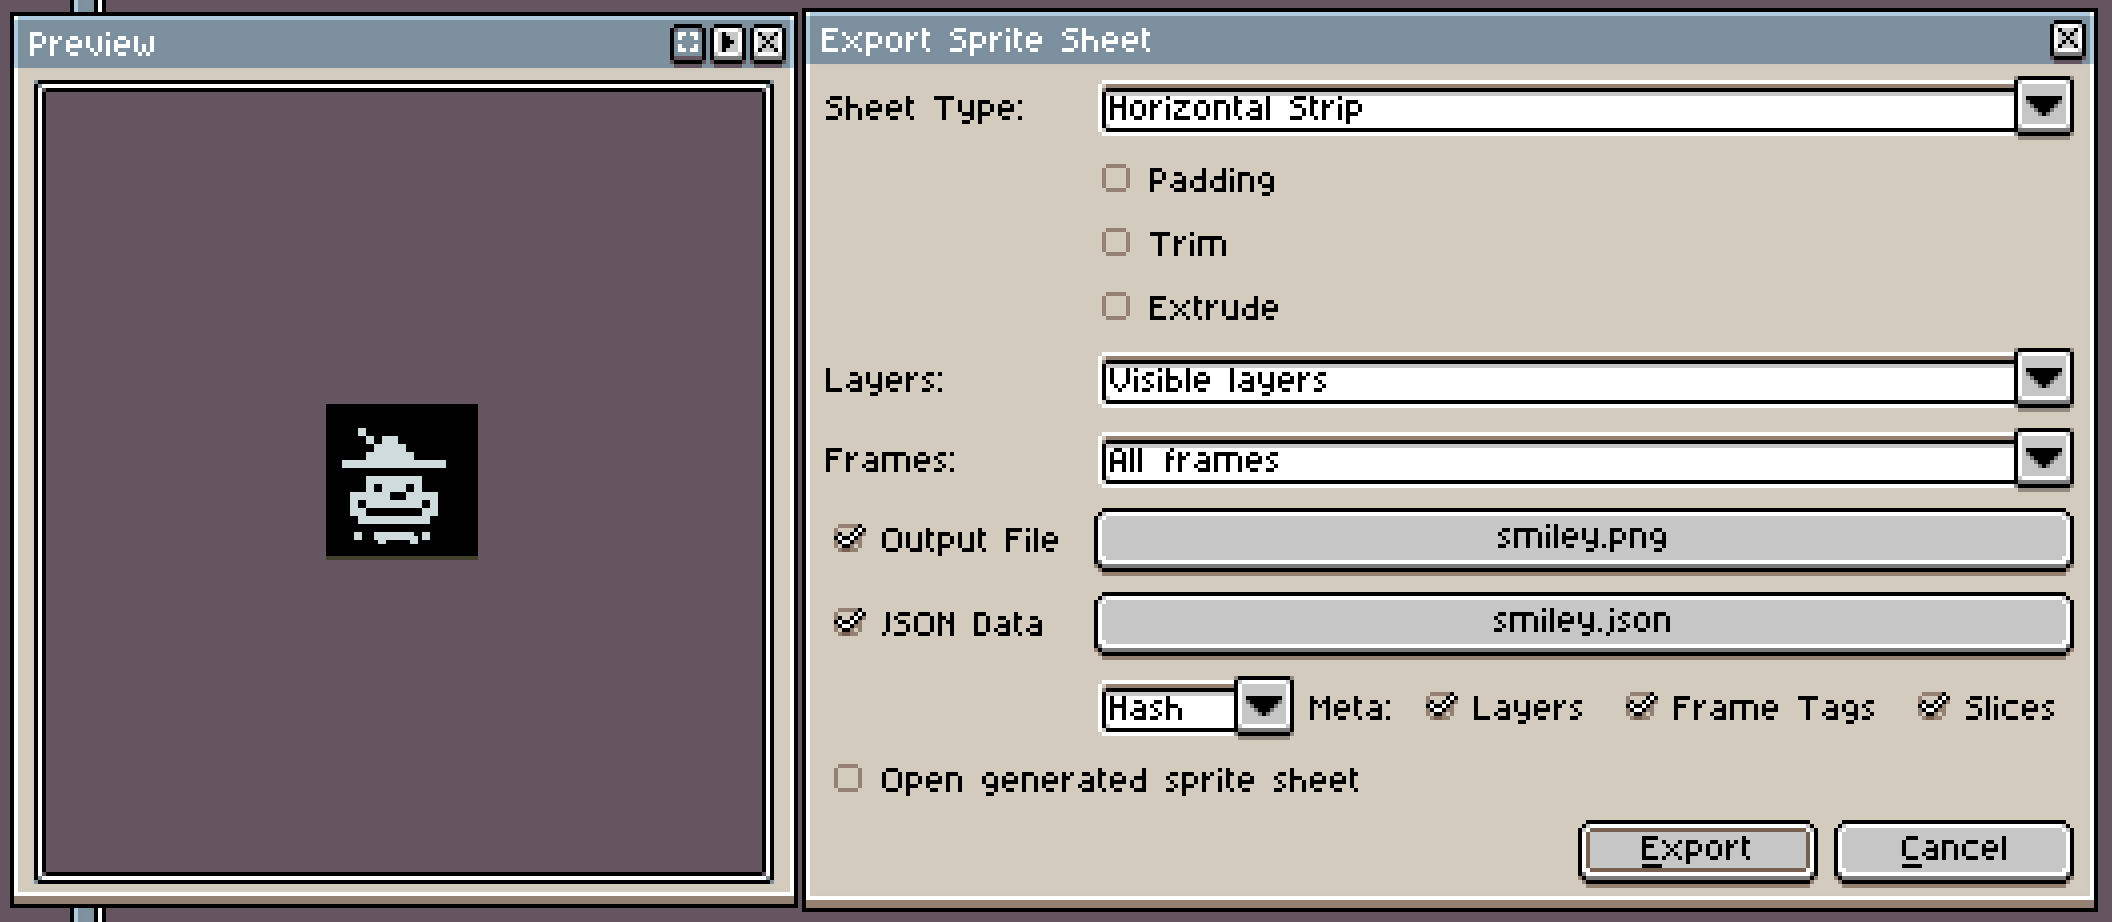
Aseprite supports many different export settings.


Our little bard's spritesheet, feel free to use this for prototyping but I do not grant permission to use this in any commercial work, it's from my commercial game after all.
Import and Playback
Popular game engines support texture atlases and slicing natively or via plugins so, for many this is where the journey ends for many developers. We, on the other hand, are just getting started.
We've asked Aseprite to pack everything together into one image and now we need to slice it back up at runtime and actually show the frames one-by-one. To "slice up" an image we'll need to tell the GPU which UV coordinate range we're currently interested in. Recall that UV coordinates always lie in the 0...1 interval so, in terms of our horizontal axis, 0 is the left-side and 1 is the right:

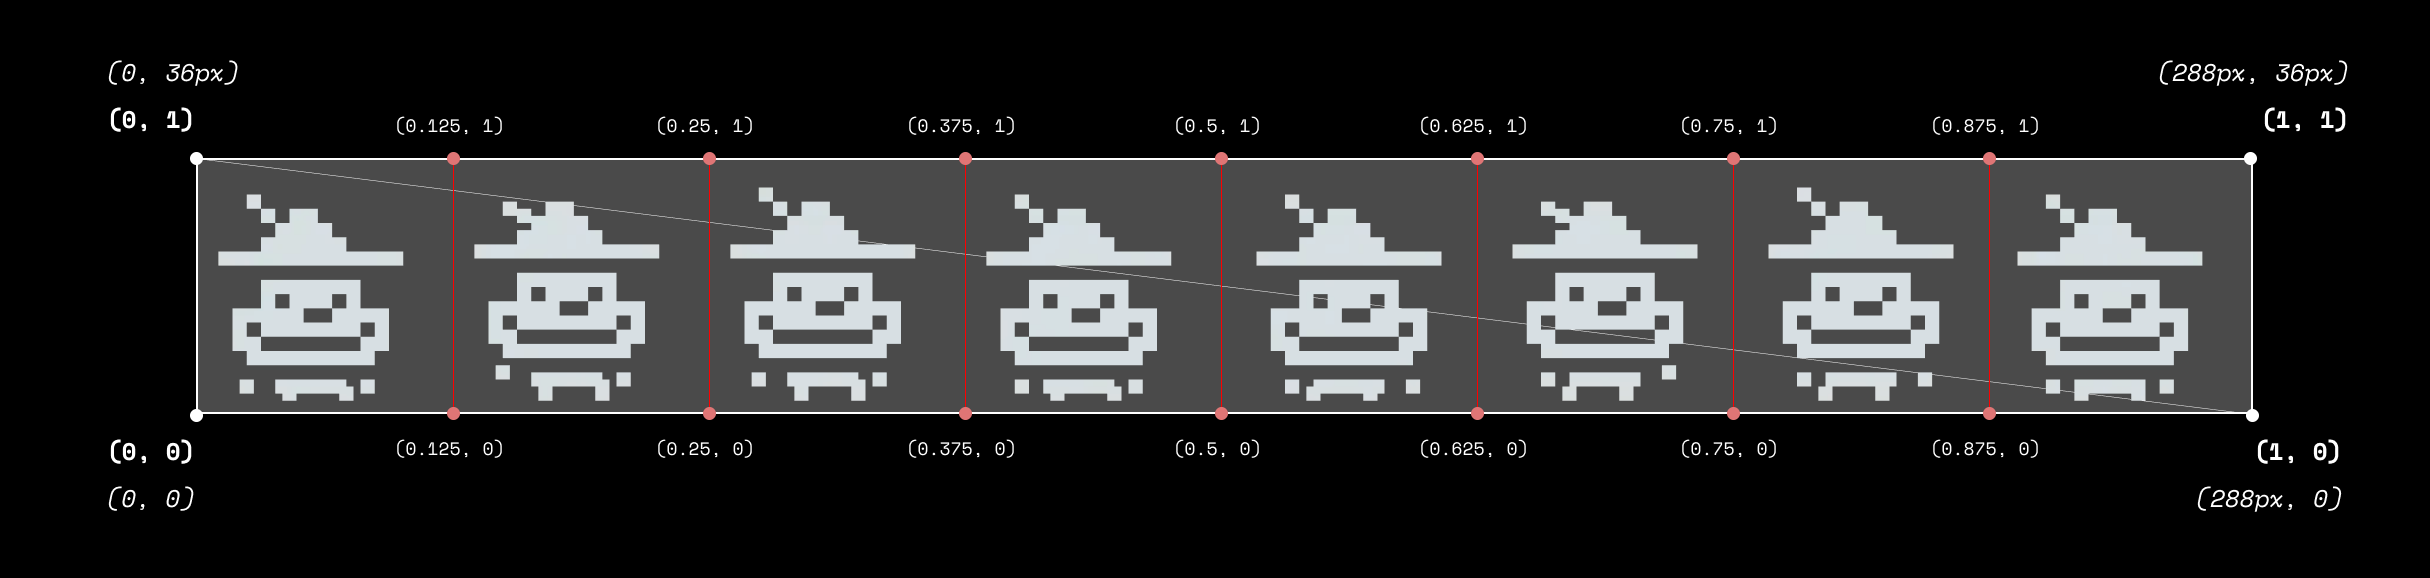
Our spritesheet with both texel coordinates and UV coordinate annotations. Note that despite our image being very wide our UV coordinates remain in the range between 0 and 1.
There are actually two smaller problems to solve here:
- showing one frame at a time from our spritesheet
- offsetting which frame is displayed
Showing A Single Frame
It might seem strange at first but we're going to do this by manipulating Texture.repeat. If we travel from 0 → 1 along either UV axis then each corresponding component of our Texture.repeat vector tells us how many times would we repeat our texture on that axis:
const texture = useLoader(THREE.TextureLoader, src)texture.minFilter = THREE.NearestFiltertexture.magFilter = THREE.NearestFiltertexture.repeat.set(2, 1)


A repeat value of 2 will repeat our texture twice on the x-axis.


A repeat value of 0.5 shows only half of our texture on the x-axis.
When we set repeat to 0.5 we only see a 50% slice of the image, we're effectively warping the coordinate space so any move along the x-axis only moves half as many texels as before. Assuming all our sub-textures are evenly sized, this lets us slice out one single frame if we know the total number. So, we can show exactly one frame at a time by setting repeat.x = 1 / frameCount.
texture.repeat.set(1 / frameCount, 1)
This effectively creates a single-frame width window to look at our texture through where repeat controls the size of the window. Next up we've got to work out how to move that window around.
Selecting The Frame
To select which frame is currently visible (and subsequently animate through the frames) we now need to set the texture UV offset. These are also normalised values in the 0...1 interval so we can feed in currentFrame / frameCount as a 0...1 range:
const texture = useLoader(THREE.TextureLoader, src)texture.minFilter = THREE.NearestFiltertexture.magFilter = THREE.NearestFiltertexture.repeat.set(1 / frameCount, 1)texture.offset.x = currentFrame / frameCount
Importantly we only need to worry about setting offset.x because our texture is a horizontal strip, meaning there is only one row of images to select from. This approach can be extended trivially to both axes if and when needed.

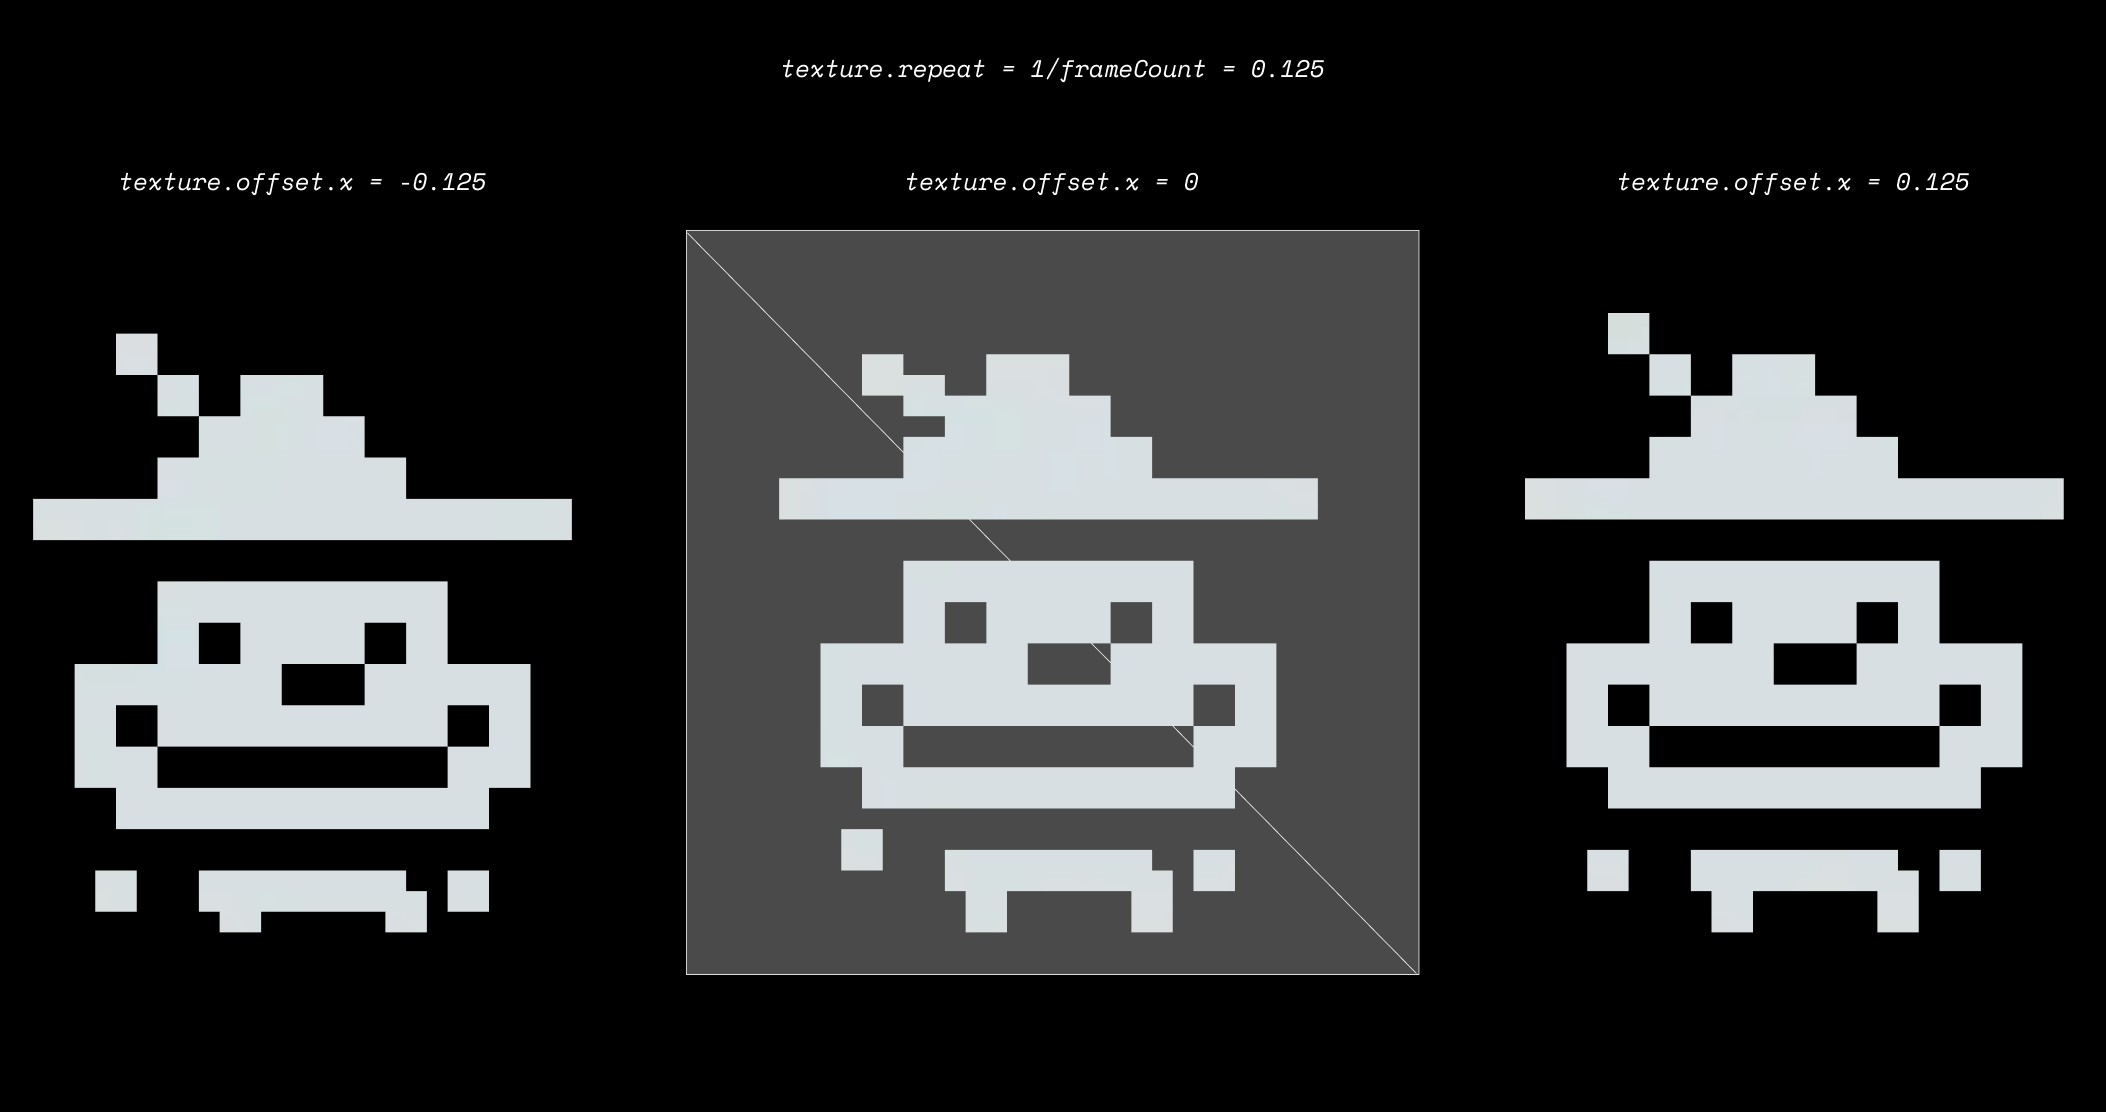
Our animation is 8 frames long, so each frame is 1/8 = 0.125 units on the u axis.
By setting these values just right we can size our window to exactly one animation frame and position it over the desired area of our spritesheet. Try manipulating both repeat and offset below to see if you can understand the relationship:
All Together Now
Finally we can bring our animation to life by changing the displayed frame over time. To do this we'll use react-three-fiber's useFrame hook, which allows us to run code every time a new browser frame is rendered. If we increment our currentFrame pointer over time we can continually update Texture.offset:
const useSpritesheetAnimation = (texture, frameTime) => {// Store time & current frame index in a ref// to avoid wasteful re-rendersconst t = useRef(0)const currentFrame = useRef(0)useFrame((_, delta) => {// Count milliseconds since last framet.current += delta * 1000// Is it time for the next frame?if (t.current >= frameTime) {// Increment the frame pointercurrentFrame.current += 1// Repeat animation if we're at the endif (index.current >= frameCount) {currentFrame.current = 0}// Reset timert.current = 0// Apply texture offsettexture.offset.x = currentFrame.current / frameCount}})return { t, currentFrame }}
Putting it all together we can render an animated sprite like so:
const AnimatedSprite = ({ frameCount }) => {const texture = useLoader(THREE.TextureLoader, src)texture.minFilter = THREE.NearestFiltertexture.magFilter = THREE.NearestFiltertexture.repeat.set(1 / frameCount, 1 / 1)// 100 milliseconds per frameuseSpritesheetAnimation(texture, 100)return (<sprite><spriteMaterial transparent map={texture} /></sprite>)}
Phew. We made it.
That's enough for one post but you might remember we exported a json file along with our spritesheet. This file contains all the metadata we need to store multiple animations in one atlas and retrieve the correct frames at runtime. To make use of this I've also written a useAseprite hook:
const BardSprite = ({ position, animation = "idle" }) => {const texture = useAseprite(bard, bardJson, animation, false)return (<sprite position={position}><spriteMaterial transparent map={texture} /></sprite>)})
useAseprite and the other hooks from this article are packaged into the brand new use-spritesheet library on npm. If you're curious how to parse and use the Aseprite json format then take a look at the type declarations plus the playback code itself.
I've also been asked to submit a PR to add these hooks to pmndrs/drei for everyone, so follow me on twitter to catch when that happens..!
Thanks for reading, I know we covered a lot! This is my second post on ⊙ fundamental.sh where I'm attempting to demystify game development, graphics and highly interactive visuals for frontend developers & explain my fundamental principles of programming along the way. Subscribe to learn more!